If you own a 1911 pistol you probably wanted to change the grips to something customized as soon as you got it. Fortunately there are a bazillion companies that make grips out of just about any material. However buying something off the shelf doesn’t really mean ‘custom’. Making something that’s one-of-a-kind adds more to the pistol than the same exact grips thousands of other people have ordered from the ‘net. You may have looked at the grips and thought ‘I can make these’ and found making sawdust and wood scraps is much easier.

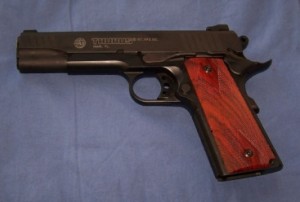
There are two main points to making proper grips: correct bushing holes and working the wood. You make the holes with the left side of your brain and finish the wood with your right. The first half of these directions will focus on the holes and the next part will deal with the finish.
Tools required:
- Wood scales big enough for your grips. They need to be 4.5” Long x 1.5” Wide x ¼” thick.
- 15/64 and 9/32 brad tip drill bits. These are hard to find one at a time so might be better to get a whole set like this Pilot Point Assortment
- 15/64 Transfer Punch from a Transfer Punch Set
- Drill press or end mill
You will also need regular stuff like a sandpaper block, files, some sort of saw and maybe a dremel tool.
The first and most important point to consider during this step is the fact that for typical commander 1911 grips, the holes need to be centered 3 and 1/16th of an inch apart. It’s easy to drill the first hole but getting the second one perfectly centered is the clincher, otherwise the grips will not fit and you waste your wood. The second point is understanding the counter-bores. The main bushing hole is 15/64 wide, and the counterbores need to be 9/32 to fit nicely with the grip screw head and bushing base. The grip bushing is .175″ tall, you can see in the diagram how they all line up. You want the bottom of the screw head to touch the bottom of the top counter-bore just as it tightens against the bushing. Too shallow of a counter-bore and you crack the wood when you tighten the screw down. Too deep and the grip moves and flaps against the frame. It may take some trial and error to get it right where you want it. The bottom counter-bore can have a little extra width, it just needs to house the bushing base flange.
 I got my blanks from woodcopier.com who will sell them pre-drilled and counter-bored for a small fee by request. If you go this route you can save money over buying all the tools you will need to do it yourself then you can just focus on the actual finish. So now we gather our tools and wood, and head over to the workbench. First, place your original grips against the back of your new scales, and outline the grips and screw holes. Mark the blanks left and right.

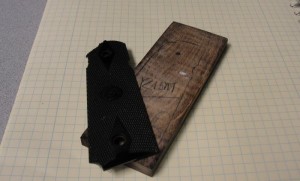
The first hole position is not really critical. Drill from the top (Which will be the visible side once done) in case the exit hole chips.

The second hole is the most important. I made this little jig to place my transfer punch.. You can use your original grip as a template for the transfer punch by placing your 15/64 bit shaft through hole #1, and marking the second hole with the transfer punch.
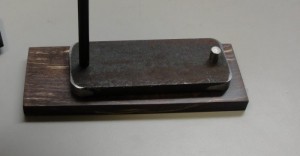

Once you have the second hole marked, carefully line up your 15/64 brad bit into the punch mark and drill slowly.
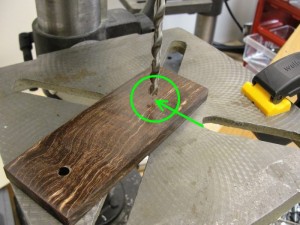
You should now have two 15/64 holes exactly 3 and 1/16 apart. Test fit it on the original or pistol bushings to be sure. Repeat for the other scale.
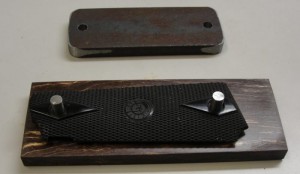
Once you are sure you have the right distance in your bushing holes, drilling the counter-bores takes some work. Start with the backs and using your 15/64 bit as a guide, line up one of the holes with your and clamp it to your drill press base.
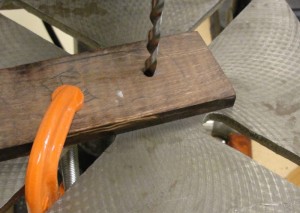
Once you have it lined up, raise the bit and replace it with your 9/32 bit. Drill a counter-bore about 1MM deep. Repeat for all 4 backside counter-bores. If you trim off the top you can now test fit them flush against your pistol frame to see if you need to drill them any deeper to clear your bushing base flange. If you need to make them wider, use a slightly larger bit, maybe a 5/16 and widen the counter-bore.

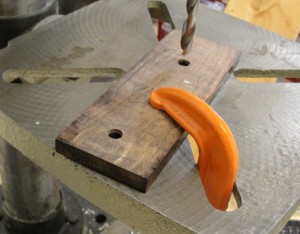
The front side or outside bores are next OR you can wait until you finish the outside then drill them. Since the bottom of the outside counterbore must be .175 from the frame, we need to make your counterbore bit stop .175 from the drill press deck. You can do this by using your press’ depth stop, chucking the bit against something .175 thick or using the gauge on your hand feed lever to indicate where .175 is from your reference point. (7/40ths!) I say err on the side of making the counter bore not deep enough, you can always take more wood away later, you cannot add it back! Use the same technique of using a 15/64 bit to line up the holes, clamp the wood down, then counterbore with the 9/32. If you are adding these counterbores after finishing the grip, be sure to use something between your clamp and finished surface so you don’t ruin the finished surface. Once your holes are drilled and counterbored you can work, finish and even checker your grip.
6 Responses to How to make 1911 .45 pistol grips, part 1