Apparently old jeep seats are rarer than hen’s teeth. The Isuzu seats in the jeep had to go though. The rear isn’t bad, it fits between the wheel wells OK but I have to get old style seats in there. I found plenty of seat frame sellers online and a great place that makes reproduction canvas for them as well as the padding. what was missing from everyone are directions on how to actually put them all together so I’ll do this little write-up for everyone else who might find themselves in the same position. Disclaimer: I am not a professional, Im just a regular dude with tools so follow my directions at your own peril.
You will need the following items:
- Seat frames
- Canvas Seat Covers ( these, the padding, screws and bottom wood template can all be found at newlifecanvas.com )
- Seat Padding
- Black Trim Screws
- 3/4″ plywood for seat bottoms
- 1/4″ T-nuts for your mounting bolts to bolt into
- 1/4″ dia. 2″ length bolts
- 1/4″ lock washers
- 1/8 drill bit
- Punch
The frames come in black so the first thing I did was rattle can the seat frames olive drab. The canvas guy also sent a template for the seat bottom piece to be cut from 3/4 plywood so get those cut.

Starting with the bottoms, put them on the frames and mark where the bolts need to go through the wood. Drill holes here ( be careful it will be CLOSE to the edge) and sink your t-nuts into the top of the wood for the bolts to bit into.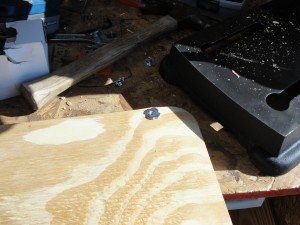
Stack your padding on the t-nut side of the wood, work your seat bottom canvas over the stack and flip it all over.

Once flipped over you have to really pull on those drawstrings to get the canvas pulled tight around the bottom of the wood. You might want to have a kid stand on the wood to make it easier. Once pulled tight around the bottom of the wood, tie the drawstrings. I went ahead and used a finishing screw to hold them and the overlapping part of the canvas in place.
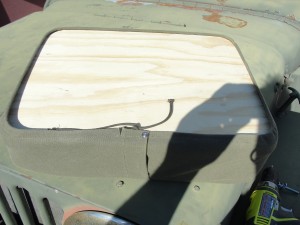
Now here’s the part where you might have the most potential for problem: Getting the bolts through to the T-nuts. If you are like my you will accidentally push the t-nuts out of the wood 3-4 times before you figure out how to get them to start threading right. when you do you get to take the seat canvas off, put them back in and try again.

Repeat for both sides and VOILA!

Those were the easy ones, the backs are a pain. the tops and sides need 4 finishing screws to hold the canvas to the frame back. I looked around and found pics that show they go on the straight part before each section starts to curve. They look evenly spaced on each section. Mark and punch the spots where you want the screws on all sides and tops of the frames. Don’t skip on the punch points. Do it or you will hate trying to drill the round frames.

Once you have them punched, drill them with your 1/8″ bit. (Check the inner diameter of your finish screws to make sure you are using the right bit and use the bit that matches the inner diameter) Then stack up your padding into the cover.

Position the canvas and pad stack onto the frame back, and get one of the finishing screws started through the canvas, then screw it into the top of the frame.
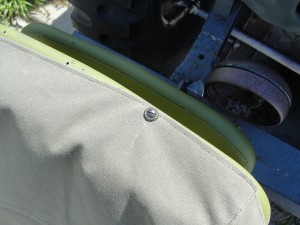
Once you have one screw in to hold everything in place, screw in the rest and VOILA:
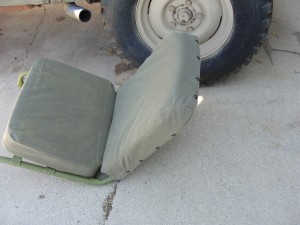
Find the mounting holes in your jeep’s floor, tranny tunnel, bed area and passenger side mounting brackets and mount them up!



I really appreciate you taking the time to post this. It made my life a whole lot easier when I went to do the seats in my friends willys.
No problem, glad I could help!