These directions will go over the Bendix replacement and pretty much how to totally take down and reassemble your starter.
In my case my Bendix went out and wouldn’t throw out and engage the flywheel anymore. That’s when your starter spins but doesn’t ‘catch’ and crank the engine over. Bendixes can be found online easy enough but no one had the directions. I decided to tear into it and just take my chances. I always take pictures when I take things apart so I know how to put them together and by the time I was done, I had enough pics for a DIY. It’s about a 2 hour job.
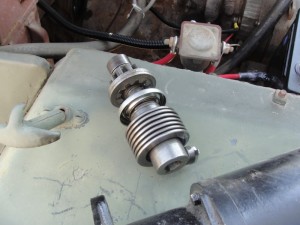
Get your new Bendix ready and make sure it looks just like the one you are taking out.
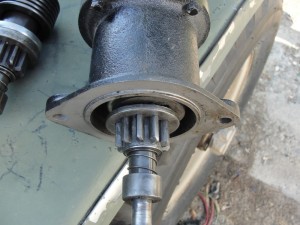
Once removed from the Jeep, I could see part of the Bendix washers had come loose and jammed against the throwout gear.

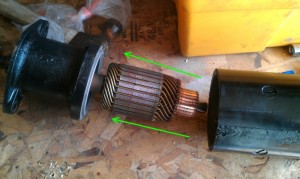
Start by removing the 4 bolts that hold the gear end body to the main body, Mark the end and main piece so you know how they line up or assembly. Mine hasa #2s lined up on both the main and end piece by one of the bolts. Then pull the whole gear end assembly with the armature out of the main body. Be careful not to drag or scrape anything and set the main part aside for now.
Next tap the thin metal shield out from the gear end housing. Don’t drop the armature. Set the end housing aside.

Loosen this bolt. You may have to bend the metal tab on the collar first. Don’t forget to bend it back when you are done assembling it. Don’t take it all the way out, just enough to release the Bendix from the armature shaft. It unscrews about 1/4″ to clear a hole then releases. Once out enough, slide the bendix off the armature. DO NOT lose the woodruff key, it falls right out!

Once you have the old Bendix off, attach the new one to the armature in reverse of how you took it apart.
Now WHOOOOA there Nelly, if you think this baby just slaps back together you got another thing comin’. There’s 4 big fat spring loaded brushes in the other end of that housing you set aside. You can’t just jam that armature back in there or you will break them or bend their mounts. So for now set the Bendix end aside and grab the main body.
Remove this band. On mine the band covered several layers of green masking tape. This must just be to help keep dirt and water out of the motor.

There’s 4 brushes in there, and they are held in place by the little coiled springs you can see through the access holes. There’s two brushes that connect to the body, and two that connect to the endcap. Look through the access holes and you can see the ones that connect to the body. Use some needle-nose pliers and move the end of the coilspring end off of the back of the brush and position on the edge of the brush bracket. Once there’s enough room, pull the two brushes connected to the body out the access holes.
Mark the endcap’s position to the body, make sure the two body brushes are out the access holes, remove the 4 bolts and set the endcap assembly aside.
This next part is the part that sucks. All 4 of those clocksprings have to now be positioned so that they rest on the edge of the brush bracket. You have to leave enough room for them to rest on the edge but still leave enough room for the whole brush to fit through. Make sure the brush will fit into the bracket with the spring resting on the edge. If you don’t position the spring exactly where shown in the images below, you may crush the spring between the bracket and armature then you get to take it apart again and start this part over.

Once that is done go ahead and position the endcap onto the end of the armature by moving the two remaining brushes out of their brackets enough to clear the armature and gently sliding them over the brush contact area. Once you have the endcap where it should be, attach the endcap bolts.

Once you have the endcap in place put the two remaining brushes into their brackets. Then move all 4 clocksprings from their resting point on the edge of the brush bracket, over the center of the brush. BE CAREFUL. If you lose grip on that spring it’s going to unspring or shoot off of its mount. Then you get to take the endcap off and set it all up again. Needle-nose pliers with grip cuts in the jaws work best.

Do the same thing for the two body brushes. Once all the springs are in place put the 4 endcap bolts in tight. I don’t have green painters tape but if that tape was for dirt and water blocking, I don’t see why duct tape wouldn’t work as well. Cover the access holes with a strip of it and re-attach the band.
That’s it! If you ever need to replace the armature, brushes or Bendix this should get you there! Reinstall the starter and enjoy!


Really helpful. Thanks
Thank you ! Very helpful.
thanks. was helpful.